Full Disclosure: I received a complimentary copy of Adobe Photoshop Elements 9. While my thoughts and opinions about the product are my own, your results might vary.
Photography is such a vital part of travel. If you can’t capture where you have been, it can be a challenge to keep up with those travel memories. I am a point and shoot camera totting traveler. I don’t have a fancy pants camera, just my trusted Canon. When I get home from an adventure, I try to make the best of what I have captured, usually with just a simple click of the “Enhance” button on iPhoto. Sometimes I kick myself for missing the moment or taking such a crooked shot of something so beautiful.
While iPhoto has yet to fail me completely, I was willing to give Adobe Photoshop Elements 9 a try to see if I could do even more with my travel photos. The software claims to help you make your photos look their complete best. Adobe Photoshop Elements 9 gives you a pretty powerful photo-editing tool that is also thought to be easy to use. The software also comes with an organize feature where you can tack on dates, captions and the like to make sure you keep track of where you have been and what you have seen.
I thought the best way to review this product for travelers looking to improve their travel photographs would be to edit a series of photographs I have taken on my travels, showing you the before and after.
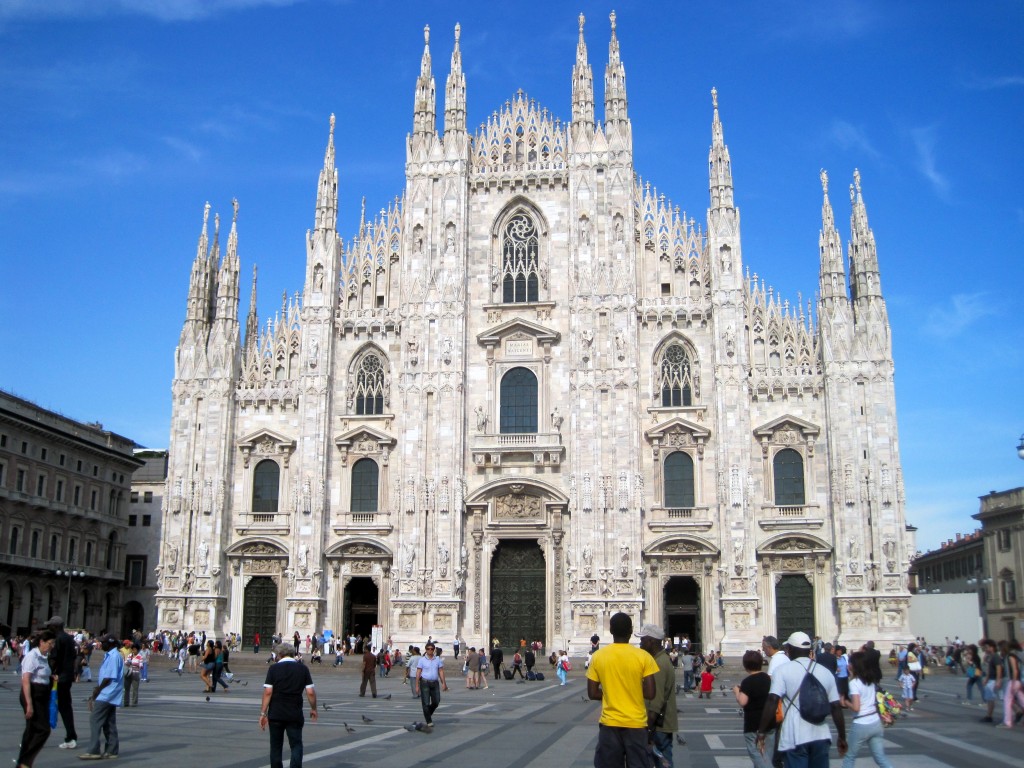
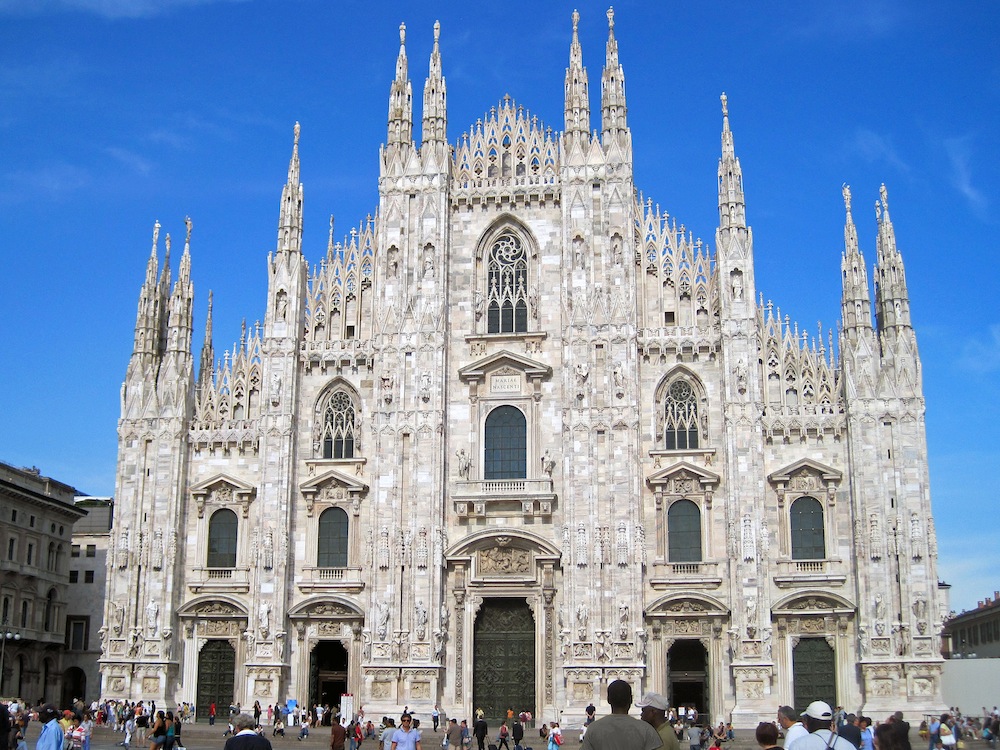
This first shot is Milan’s Duomo. I thought it would be challenging to make this grand structure look even better. Using the quick selection tool along with the hue and saturation feature, I was able to turn the distracting yellow shirt of a man in the photograph to gray. I also cropped the photograph and I utilized the Enhance Menu to Auto Fix the colors and sharpness of the building.
Milan’s Duomo Before
Milan’s Duomo After
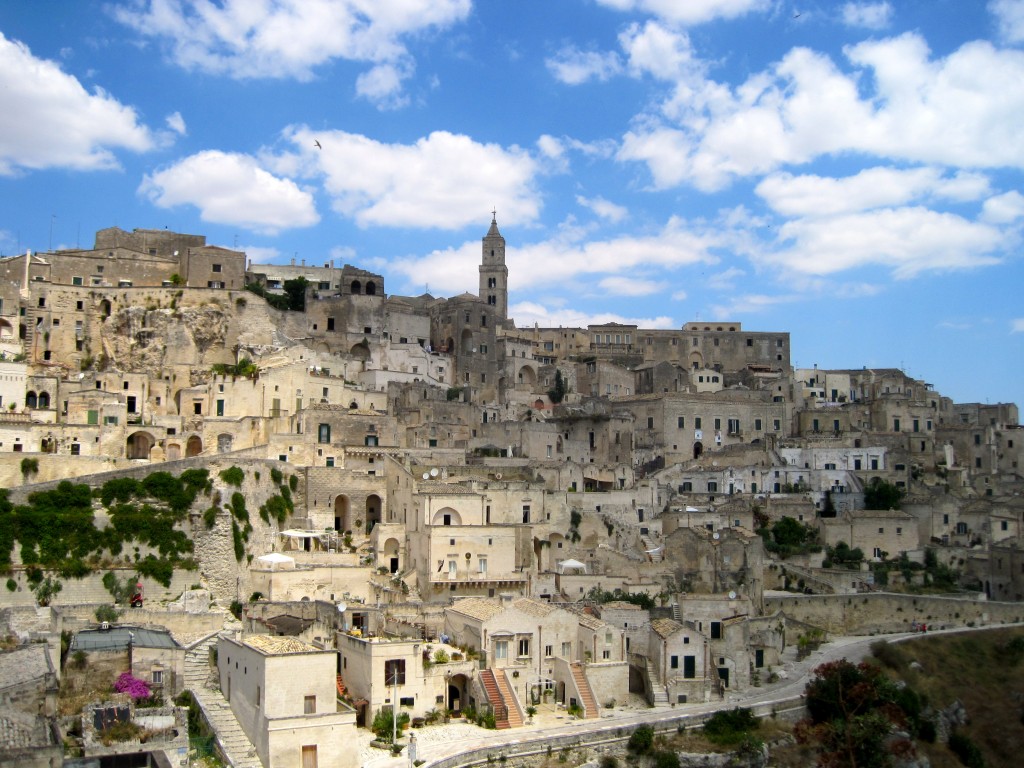
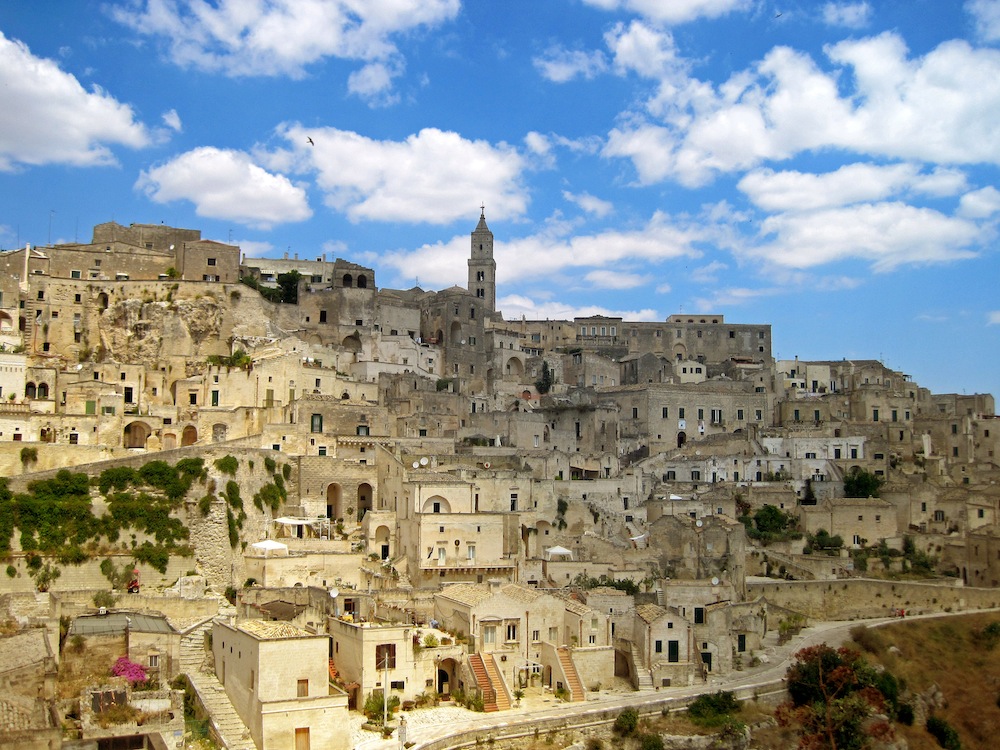
The next photograph I decided to change was a shot I love of Matera, Italy. Playing around with the Enhance menu, I auto corrected problems in the photograph, with the exception of the auto color. Then I used the gradient tool on a new layer coupled with the soft light filter. This gives Matera a warmer and richer effect, putting me right into the warmth of the Mediterranean.
Matera, Italy Before
Matera, Italy After
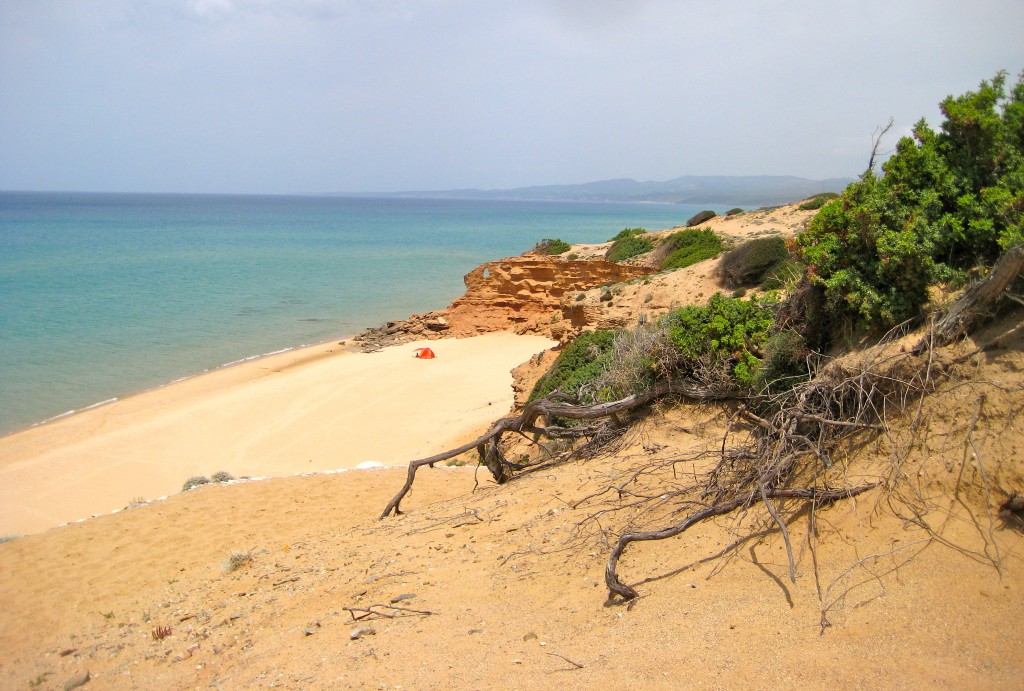
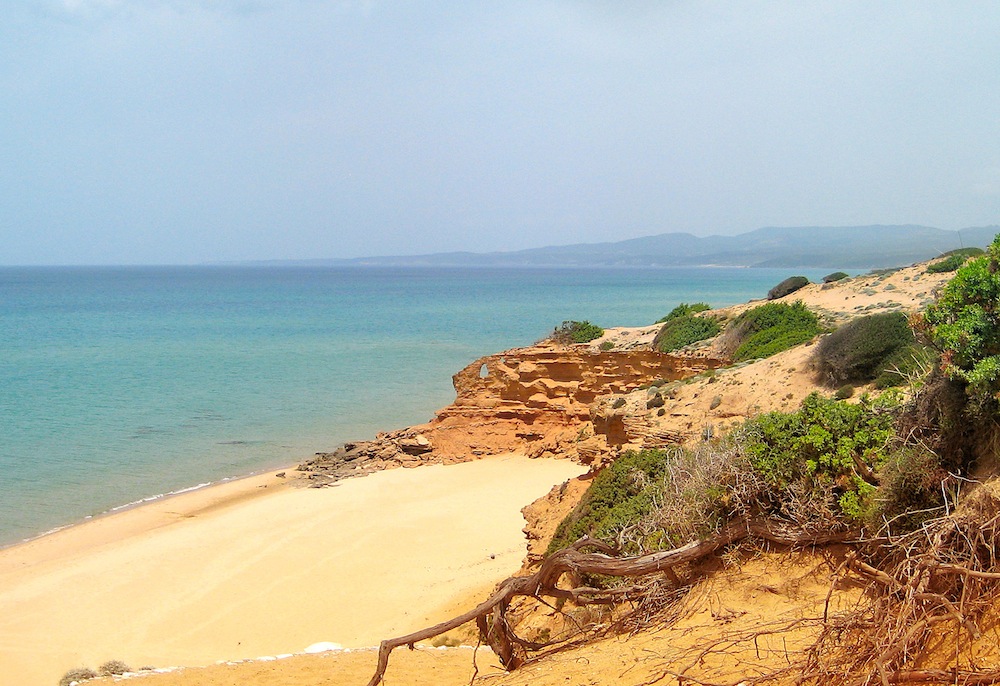
This next photograph is of a beach in Sardinia, one of my favorite spots in the world. I didn’t think it was possible to make this beach look better. I zoomed in on the photograph to provide more attention and focus. I also straightened the photograph. I tried out the Clone Tool to remove rubbish on the beach, including a bright orange tent. I then used the gradient tool on a new layer with the soft light filter to make the beach look even warmer and the sea and sky cooler.
Sardinian Beach Before
Sardinian Beach After
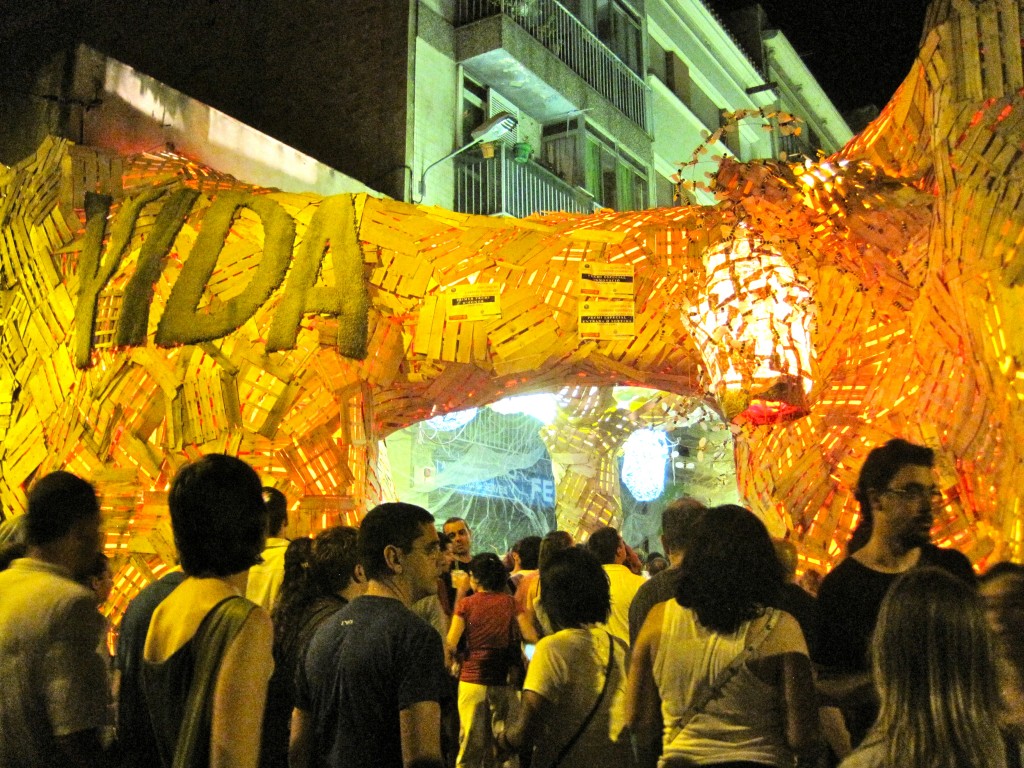
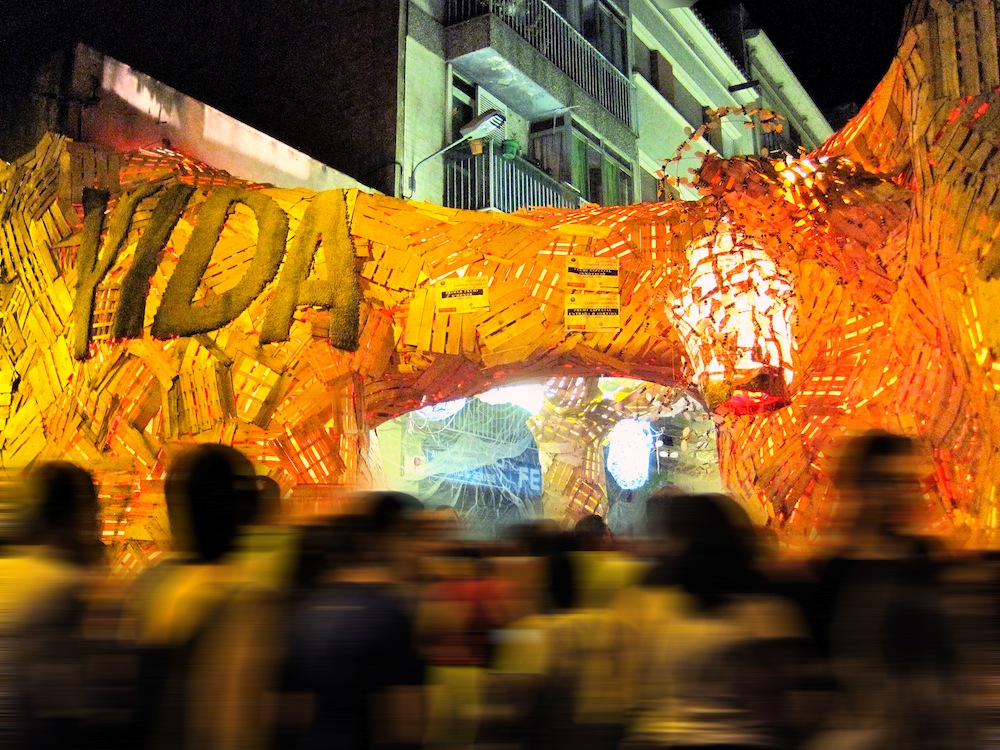
Finally, one of my favorite photographs to come out of trying Adobe Photoshop Elements 9 is a night shot of the Gracia Festival in Barcelona. I used the Enhance feature along with the Color Variation to make it darker. I didn’t like how grainy this photograph was before. In turn, I made the brighter areas redder. I then used the Motion Blur Filter in the Filter Menu. By using the Eraser Tool, I could make it appear as though only the foreground was in motion. For a night shot, the background doesn’t move. Here I have created a long exposure to show movement, when I never did so when I took the photograph.
Gracia Festival Before
Gracia Festival After
What I Thought
I did find Adobe Photoshop Elements 9 to live up to its claim of making your photographs look their best. However, I will say it was not so simple to use. You have to have some knowledge of Photoshop or a long weekend to read up on how to use each feature. I also didn’t find the Organize element to be extremely useful, but that could be my laziness talking. From a travel perspective, if you have the time to organize your photographs in this feature, you could certainly save headaches of trying to figure out who and what you saw. Overall, if you are looking to improve your travel photographs with a somewhat simple and affordable tool, I recommend Adobe Photoshop Elements 9. You don’t have to be the best photographer with this software.
Note: This product does not come with a teenager like my brother Charlie Guese to help you figure it out. Special thanks to Charlie for helping me use Adobe Photoshop Elements 9.
Have you tried Adobe Photoshop Elements 9? What do you use to edit your travel photographs?


Very cool that you got a trial! It can be tough to use if you’ve never used it before so kudos to you!
Nice! I really like what you did with that last photo. I didn’t know you could do that in the editing process.
Suzy, I like what you’ve done with these edits. It’s especially the last photo (with the motion blur) that I find impressive. I agree with you that PS is not the easiest program to just use for the first time; however, it’s worth the effort because it offers features other programs simply don’t have.